Slouchy beret in double crochet

DSC_0285

So the crochet spree is still going on? You bet it is, with switching to winter time and the resulting long dark evenings. And what can be more fun and rewarding than making something you can whip up quickly to wear the next day?

I had long wanted one of those cute slouchy berets, and I had some deliciously soft velvet yarn sitting in my stash, calling out, “pick me up and do something with me” – so I did. By the way, it turned out a lot more economical than I thought it would. I only used one 100 gr skein of the navy blue yarn and a bit of grey for the flower. Which leaves me with plenty more yarn to make matching berets for my daughters! Hurray!

There are lots of fancy hat patterns out there, with cables and ridges and bobbles and swirls, but I soon realized it’s better to go for the simplest way when working with this yarn, which is as snuggly, warm and floppy as a newborn kitten.

The basic free-form instructions to make a beret go like this: start crocheting a circle and, increasing the number of stitches in each round, create something like a flat pancake the size of a dinner plate (give or take).

Crochet one round without increasing. Then begin decreasing at the same rate you were doing the increase on your last row. That is, if you were adding a stitch every ten stitches, start decreasing every ten stitches by skipping a stitch. Try on your beret from time to time. Once it fits on your head to your liking, make a few rounds without increasing or decreasing for the brim. I made the main body of my beret in double crochet and the brim in single crochet for a snugger, denser feeling fit.

You can add a flower like I did – there are lots of fancy ideas out there, but I just did something basic: make a slip knot and work double crochet stitches into it to make a snug circle. Then make the petals by working alternately 3 DC in one stitch, 1 SC in next, and so on.

Secure your flower by weaving the loose ends into the brim of the beret.


Snuggly puff crochet poncho

IMG_20191023_171600_092

Autumn, with cooler, shorter, rainy days has come even to our warm corner of the world, and what can be better to celebrate this change of seasons than a new warm cozy poncho (crocheted out of upcycled merino wool with an alpaca trim)? It feels like wearing a snuggly blanket and making it was pure delight.

I kind of winged it and don’t have an exact pattern precisely because it’s such a basic, easy garment. Essentially, if you know how to make a granny square, you can make a basic poncho. 

Start by creating a chain and joining the two ends together, making a circle. This will be the head opening so don’t make it too tight. Make a row of double crochet around the chain, adjusting your number of stitches so that it’s a multiple of 4.

Divide the number of stitches by 4 and, at the end of each quarter, create a corner as you would when making a granny square and crocheting from the center. Once you have your corners established, that’s it! You just keep adding, and the possibilities are endless. I used a freestyle combo of V-stitches and puff V-stitches for a bumpy textured look.

Once you have made your poncho as long as you like, return to the beginning and start working upwards from your foundation chain to make the cowl neck. I used this vintage pattern for mine:

dsc_0280-e1571860048946.jpg

In the end, if you have some leftover yarn, you can choose to make a fringe like I did. There are several methods for making a fringe, and I chose the simplest one I could find. I love fringes for the cute boho look they give and for their ability to make a garment visually longer with very little effort and comparatively little yarn.

With some creativity and daring, you can make your own original cozy poncho. Happy crafting!

Light cotton crochet cardi

img_20191013_105554_422.jpg

In a final crafting spree before the Feast of Tabernacles, I finished this light cotton cardigan in the picot fan stitch. I worked from the top down, following this tutorial, and then added a harmonizing border around the edge and sleeves.

I used a beautiful, soft, drapey bamboo and cotton blend and crochet hook number 2.

I look forward to wearing this during the balmy Sukkot evenings.

Cozy cabled crochet beanie

DSC_0248

The cozy winter hat for Israel is done, and I love how it turned out! This was my first attempt at two nifty crochet techniques, namely the stretchy slip stitch ribbing and the cabling (which also involved mastering the front and back post double crochet). It was incredibly fun to learn and I love the texture I got! I followed a wonderful, very clear tutorial from All About Ami almost exactly, except that I found a matching pompom in my stash rather than making my own.

I used lovely, irresistibly soft single-ply merino yarn and a crochet hook number 3.5. Working with single-ply yarn was another novelty for me, and it certainly does come with its own challenges. The yarn doesn’t hold up its structure as firmly as three-ply, and doesn’t take kindly to ripping out (which almost inevitably happens in a row or two when learning a new technique). But the softness and beautiful sheen were just lovely.

I hope Israel wears this hat with as much pleasure as I had making it.

PS: Did you mean to ask when I had the time to do this in the middle of the High Holidays prep? I kind of wonder myself! It was a fantastic way to relax and feel I’ve accomplished something at odd moments here and there, that’s for sure. I wish all my Jewish readers Shana Tova and a wonderful year ahead.

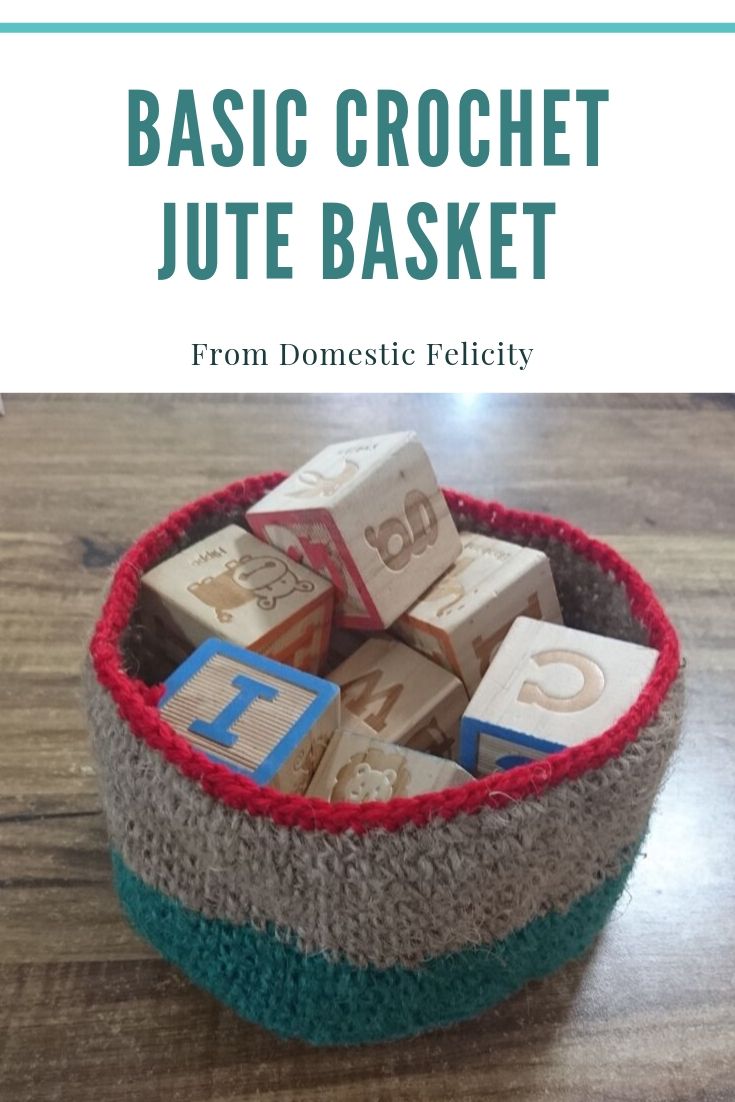
Rustic crochet jute basket

Basic Rustic Jute Basket

A great, basic basket for beginners!

DSC_0229

It seems like we can never have enough containers for all the toys and art supplies around here, but utilitarian plastic bins, however useful, are not very aesthetically pleasing. What better solution than to attempt making my own baskets to keep all the kids’ stuff in rein?

This was my first attempt at crocheting with jute twine, and I was pretty pleased with the result. Furthermore, it was just about the cheapest item in our local craft store! I spent about a dollar and a half on the materials for making this little basket, and that’s with picking a smallish package, which was relatively pricier.

I followed an important tip for baskets: to achieve a sturdy, firm shape (rather than a floppy bowl), crochet a flat circle for the bottom, and then work the next round in slip stitch in the back loops only.

Proceed to work in single crochet in the front loops of the same row. Then work your way up as you normally would. This creates a sort of angle that really helps the basket stand on its own.

I worked the final row with acrylic yarn for a nice color contrast, and I also made the tension a little tighter to pull the top a bit more closely together, which makes the basket even sturdier.

Pretty pineapple crochet bolero

IMG_20190904_173428_057.jpg

Yes! I am pretty proud of myself for accomplishing the intricate and beautiful pineapple stitch in his lovely bolero. Inspiration from here. Skill level: intermediate to advanced.

Crochet hook number 3. Material: soft cotton.

Good and straightforward tutorial for pineapple stitch can be found here.

With some crochet skills and an adventurous spirit, it’s possible to make a bolero with virtually any stitch, working from the top down. Start with a foundation chain and work the pattern back and forth across each row, increasing so that you get an almost circular shape. Drape over the shoulders and bind off the sleeves when desired and keep working the pattern below, skipping the armholes.

Another little crochet doll

No photo description available.

I’m just weaving in the ends of my newest crochet creation, a little amigurumi doll that I had tremendous fun making. The theme was traditional Ethiopian clothing with a Jewish theme, though admittedly my star of David looks a bit more like a flower.

I know dolls are something I’m going to make again and again now that I’ve discovered it. It’s tremendously fun, takes relatively little time (instant gratification!) and allows me to use up all the little odds and ends of yarn I have sitting around.

  • Check out this great guide to basic amigurumi here
  • Tons of free amigurumi patterns here