Fenugreek: A WonderHerb

Hilbe, a spread/dip made of Fenugreek seeds or leaves, is a staple of Yemenite Jewish cuisine, and is usually eaten at one or more of the Shabbat meals. It goes amazingly with pita bread. The recipes vary, and can include garlic, lemon juice, and various herbs and spices.

Fenugreek itself has some wonderful nutritional benefits, being rich in calcium and magnesium – and also some very special health properties. It has a beneficial effect on blood sugar regulation and is known as a milk-supply booster for nursing mothers. I had taken Fenugreek capsules in the past, when I reckoned I needed to build up my supply, and I reckon they helped a bit, but nothing very dramatic. However, after a Shabbat of enjoying homemade hilbe spread in very moderate amounts, I suddenly felt a very prominent increase in my milk supply, something I didn’t even think of or aim for (since my baby was almost one year old and I figured we have a pretty steady supply-demand thing going). I suppose this effect was due to pre-soaking the Fenugreek seeds for a couple of days, thus allowing the special plant components to activate.

I think that’s really worth noting, as capsules are so much more expensive – and, apparently, less effective – than the real thing. I’m not sure you can buy Fenugreek everywhere, though. In Israel, the seeds are available in health food stores, and the leaves can be found at certain markets in season.

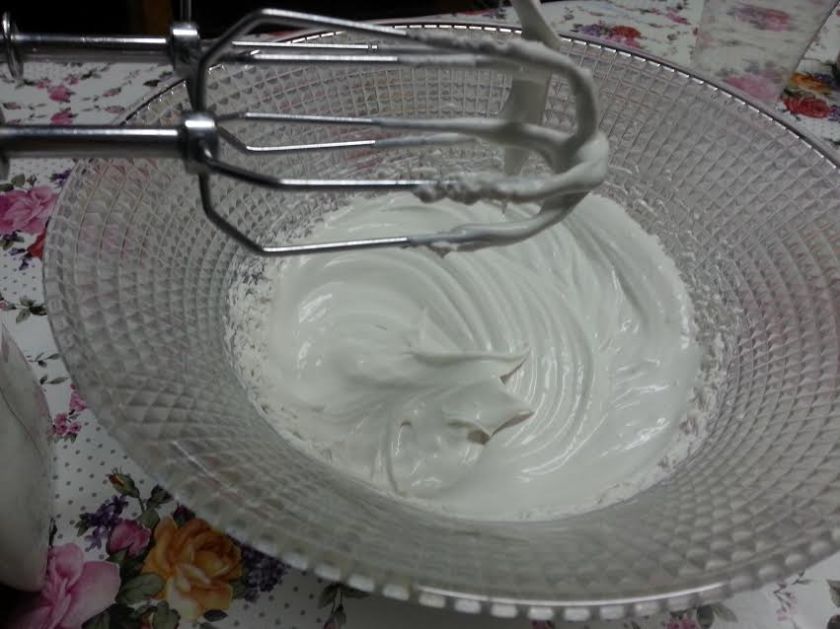
Here is the recipe we used:

– about 1\3 cup dry Fenugreek seeds. Place in a bowl of water for 48 hours, changing the water every day. The seeds will swell considerably.
– a bunch of fresh coriander, about 3\4 cup shredded
– 2 big cloves of fresh garlic
– juice of one lemon

– salt and pepper to taste

Once the Fenugreek seeds are soaked and drained, place everything in your food processor. Blend thoroughly and add water as needed, to reach desired consistency (thicker/thinner, however you like it). Once finished, it should have a refreshing characteristic smell, and look bright green, sort of like this:
Image taken from here.

A word of warning: hilbe has a dominant smell; some like it, some don’t mind, some wish they could do without it. The smell can later come out in your sweat, or even in your baby’s diaper. The Fenugreek capsules don’t smell when you take them, but the smell comes out with a vengeance later through all your pores.

Recently I’ve decided to try growing some fenugreek from seed, to see if the fresh leaves are as good or better as the dried ones we use in various dishes. So far it’s proving very easy to grow – I just made a shallow trench in one of the garden beds, threw in some dry Fenugreek seeds from the store, and almost all of them sprouted. Once the leaves are big enough to use I’ll be sure to let you know how it has turned out.

Drying hyssop

hyssop

We don’t often find fresh hyssop in stores, so when we came across it we grabbed a bunch and I decided to take advantage of the dry, windy weather we’ve been having to dry it up.

Dry windy spells in winter are a pain. They make being outside unpleasant, they cause one’s hands to dry out and crack, and what’s more serious, they dramatically increase the risk of wildfires (by the way, thanks so much to those who have expressed concern for our family – we are thankful to say we are in no immediate danger of fire, but are keeping alert and hoping for rain). But these winds are perfect for drying herbs.

Drying hyssop – or any herbs, really – is very simple. All you have to do is take a good-sized bunch, tie it by the stems and hang it outside – or, if the wind is really violent like it was this time, put it in a mesh bag to prevent the leaves from scattering.

Of course, a food dehydrator or a simple oven can work just as well. Or you can hang the herbs inside. They will dry up eventually, only it will take longer. On the upside, they will make the room smell nice.

Once the hyssop is properly dry, remove and crush the leaves and discard the stems. The crushed leaves can be used as a seasoning in various dishes or, as is more common in Israel, mixed with olive oil, salt and sesame seeds to make za’atar, a popular local dip eaten with pita bread and/or cream cheese.

Easy Coconut Cream

Every time I’m whipping up a dessert, my husband hopefully asks, “is it parve“? Parve essentially means a dish that contains neither meat nor dairy. Since Orthodox Jews must wait six hours after consuming meat or chicken before they can eat dairy, it’s no wonder most people try to make their desserts parve. Unless they are vegetarians, in which case it doesn’t matter.

Unfortunately, in many cases this leads people to use unhealthy ingredients such as margarine or fake cream with partially hydrogenated vegetable oils in the desserts they make – and a whole lot of sugar to make the entire thing more palatable. For me, parve dessert has usually meant fruit salad or, in season, chilled melon or watermelon… that is, until recently I discovered the wonders of coconut cream.

Coconut cream contains natural, stable, healthy fat (in particular containing large amounts of lauric acid, which is renowned for its antibacterial, antiviral properties) and, when chilled, has the perfect consistency for whipping – in fact, it acts almost exactly like normal cream.

coconutcream

Whipped coconut cream. Doesn’t it look just like the real thing?

So here’s how you do it: pick  a can of coconut cream containing at least 17%-18% fat and chill overnight. A hard fatty layer will form on top; skim it off carefully with a spoon and add a little of the liquid at the bottom (use the rest of the liquid in baking or smoothies). The cream can be whipped and combined with all sorts of flavorings to create a variety of desserts. Yesterday I made delicious halva mousse by whipping up the coconut cream with raw tahini and some honey. I imagine it would go equally nice with chocolate… yum! I imagine it can also be frozen to make natural, dairy-free ice cream.

Personally, I love coconut, but the taste of it is very mild in the cream, so even those who aren’t coconut-crazy can enjoy this.

***

I also wanted to let everybody know that the work on Your Own Hands, the new simple living book, is going well and at this point I have most of the first draft complete. I also put some improvements and formatting changes into The Practical Homemaker’s Companion, which is now 122 pages long. I left the Payhip price at 4$, less than the print and Kindle version, as I really prefer people to download from Payhip because it only takes a small commission compared to Amazon and payments are instantly transferred to our Paypal.

Preserving and processing hot peppers

Above: dried hot peppers

As we are still harvesting an abundance of hot peppers, we must think of ways to use up all this bounty before it spoils – or else preserve it for future use.

The easiest way by far to preserve hot peppers is drying them. This can be done in an oven, in a food dehydrator or outside in sunny weather. I don’t have a food dehydrator, so sun-drying and oven-drying are the two options I use.

To dry a batch of hot peppers, first cut them lengthwise and remove the seeds. Careful – wear gloves while handling, because those little capsicums can be treacherous. Place the peppers on a cookie sheet lined with baking paper.

If drying outside, cover the cookie sheet with metal wire, cloth mesh or anything else that will keep birds and insects away but still let sunlight get to the peppers. Place in direct sunlight and turn peppers over every few hours. This process may take several days, depending on the amount of light, degree of heat and humidity.

For oven-drying, place the cookie sheet with the peppers in the oven and turn it on a very low heat. Remember, you don’t want them to be roasted – you just want all the moisture to evaporate. Keep the peppers in the oven, turning from time to time, until they are quite dry and brittle.

At this point, your dry pepper slices can be stored in a tightly sealed jar, where they will keep for a long time. You can also pulverize them in a food processor and make your own hot pepper powder, which you can likewise store in a jar. This powder can be used for seasoning various dishes as is, or made into hot paste or sauce with some salt, fresh or dry herbs and olive oil.

***

As this will probably be my last post before Rosh Ha-Shana, I’d like to take the opportunity to wish all my Jewish readers a very happy start of this new year.

The perils of peppers

This season we were blessed with a large quantity of hot peppers (all from only four thriving plants), so I’ve been busy making hot sauce inspired by the Yemenite hot pepper spread/dip called Zhug. I don’t really have a recipe; just throw a bunch of de-seeded hot peppers, a head of peeled garlic cloves, a bell pepper, some tomatoes, a generous splash of olive oil and salt to taste into a food processor and whip it all up. It makes a fabulous sauce\paste to add to stews, meat and fish dishes, soups, etc.

Unfortunately, it has been a while since I used fresh hot peppers, so I was careless and didn’t use protective gloves. The deception was in the delay: I didn’t feel any burning in my fingers until I was done cutting up the peppers. Then it hit with a vengeance.

Even more unfortunately, my kids, who like to get into anything that goes on in the kitchen, grabbed some peppers too – and touched their faces without even washing their hands. Ouch. It was a disaster – for the next hour, I was dealing with crying, hurting kids. My eldest sincerely advised me to throw the whole bunch of peppers away (“because nobody wants to eat something like this!”).

I’ve tried some of these remedies for stopping hot pepper burn, but nothing really helped us. The kids felt better pretty quickly. I had to endure several very unpleasant hours of burning sensation in my fingers, hands and any part that was exposed to the capsaicin in the hot peppers.

20160913_165128

Hot peppers: beautiful but deadly (well, almost)

Lesson learned: next time I work with hot peppers, I’m going to wear gloves and warn my children to stay away.

By the way, I wanted to let you know that The Practical Homemaker’s Companion is now available in a new, extended edition of 90 pages, with added content and photos – for the same price. Those of you who have already bought a copy and are sorry to miss the new edition, don’t worry – simply email me using the contact form, and I’ll send you the updated version. Also available in print. Disclaimer: as the printed version is in black and white, I can’t vouch for its photograph quality. Opting for color print would have made the book too  expensive, so I compromised in favor of price.

Making carob powder

The pods of the carob tree are rich in minerals and vitamins, and can be utilized to make tasty, naturally sweet powder that is often used as a cocoa/chocolate substitute. Now, I personally can always tell the difference between carob and chocolate, but I still like the taste very much and think it’s great in brownies and other baked goods. As a bonus, unlike cocoa, carob is naturally sweet, so when using it I can cut back on added sugar.

Carob trees grow all over Israel (and in other similar climates) and the dark brown pods can be picked in the summer, for free, if you know where to look. They make a tasty, chewy snack right off the tree – only beware of the little hard seeds. They also keep extremely well, so you can pick a big bunch and then process it in parts at your convenience.

Make sure the pods you pick are ripe. They are supposed to look and feel dry and to come off easily from the tree. To make sure, break one in half and taste it. Pick the biggest, shiniest, healthiest-looking pods.

Wash the pods and boil them for around 30 minutes to soften them. This way they will be easier to de-seed. Cut them lengthwise with a sharp knife, remove the seeds, break into pieces and place on a cookie sheet. Dry in the oven on low heat – really low, as you don’t want to burn them (it will give the powder a bitter tinge), or in the sun. The pod pieces should be really crisp.

roasted carob

Throw your dried carob pieces into the food processor. Once you have mostly powder, sift to remove any chunks that are left, then return them into the food processor and repeat. I know my end product isn’t really like commercial carob powder – I could have used a finer sieve, but I didn’t bother. I know it will be quite good enough in my brownies.

powdered carob

Once the powder is ready, it can be stored in a tightly closed glass jar for a long time.

Processing prickly pears

Prickly pear season is here, and my husband got a big bunch very cheaply, from someone who picked them off the hedge on his property. When he came home with the loot, I foolishly forgot that the prickly pear is – well, prickly – and carelessly grabbed one. I had a quick, painful reminder of the fact that the prickly pear, actually the fruit of the opuntia cactus, is full of tiny fiberglass-like spines called glochids, which very easily get embedded in the skin and are very difficult to dislodge. Soaking my hand in warm water helped get most of them out, though, and I carefully proceeded to look for a pain-free way of utilizing this unusual fruit.

Rule number one: don’t touch the skin of the prickly pear with your bare hands. Wear thick gloves or, as I did, use tongs. 

pricklypeartongs

While holding the prickly pear down with tongs, use a knife to cut off the edges (“top” and “bottom”) of the fruit. Then cut several slits, length-wise, in the skin and pry it off with the tip of the knife. It’s a little tricky at first, but you’ll get the hang of it.

Briefly wash your peeled prickly pear under a running tap, to make sure any glochids that might have stuck to the fruit are washed away. You don’t want them in your tongue!

At this point you can eat the prickly pears fresh, or juice them. To make juice, I first mashed the fruit with a potato masher, then strained the whole mess. The juice is great as part of cold beverages, and can also be made into syrup or jelly. The remaining seeds, mash and peels make a great treat for chickens (or, if you don’t have chickens, they can be composted).

mashpricklypears

Mashing the prickly pears

I do have to say, though, that the whole process is somewhat labor-intensive: a whole lot of fruit gives comparatively little juice. Since the season of the prickly pear is short, it’s alright as a once-a-year project, but I wouldn’t do it on a regular basis.

pricklypearjuice

Above: prickly pear juice, for a refreshing cold drink or for making syrup or jelly. I love its bright orange color.