Myrtle berry jam

Following my previous post on myrtle’s culinary uses, I have been experimenting with myrtle leaves and berries some more. I guess I’m just really tickled that there is a berry which grows well and prolifically in our area – and it’s free for picking!

I have tried to search online for myrtle berry jam recipes but couldn’t find anything definite, except that on one site I’ve read the berries are used in mixed fruit jam, generally along with apple. I cooked up a small experimental batch with about 1:1 ratio of myrtle berries and apples, sweetened to taste. After cooking, I ran it all through a food processor and got a beautifully colored, unique-tasting jam which I’m sure will be great as yogurt or granola topping, on toast, or even as roll or pie filling (if I make a larger batch).

The astringency of the berries is almost gone after cooking, and the only improvement suggestion I’d give myself for the future would be to strain the cooked berries and discard the seeds, which have a somewhat coarse texture and slightly bitter taste.

Left: myrtle berries; right: apple and myrtle berry jam. 

Little homes, creative solutions

Lately I’ve been greatly enjoying Teri’s blog, Homestead Honey. Teri and her husband live in a charming tiny cabin of 350 square feet (just over 32 square meters) that they had built themselves. They have two children, whom they homeschool.
How do four people fit into 350 square feet? On her blog, Teri talks about some creative solutions that have enabled them to live in their small space. They have, for instance, an outdoor kitchen and an outdoor shower. And, of course, despite having a storage shed they need to be very selective about which possessions they keep.

We live in a house of about a 100 square meters, or 1070 square feet. In addition, we have a storage shed of about 15 square meters (about 160 square feet). Our house is by no means huge, but I confess we do have a lot of poorly utilized space. First, our storage shed is filled to bursting with stuff we hardly use. We also have an office and a guest bedroom that are seldom used for their direct purpose, and a lot more for accumulating junk. In addition, we have three bathrooms in our house, out of which one is used very, very rarely, and its shower not at all – I consider it completely superfluous.

So, while it’s certainly nice to have a roomy house and lots of space to put our stuff, it’s an undeniable fact that a family like ours can downsize and live in a smaller house that is easier and cheaper to heat (or cool), clean and maintain. Also, in Israel, the smaller your house is, the lower the occupation tax you pay.

Of course, you wouldn’t pay occupation tax for an outdoor kitchen, an outdoor shower, a storage shed or a covered front porch/deck/pergola that would enable you to place garden furniture, benches, swings, hammocks, and spend many pleasant hours outside! The only hitch I see in this arrangement are the days when you are confined to the interior of your house – when it’s too rainy, windy, stormy, cold or, as more often happens in Israel, too hot.

img_9932

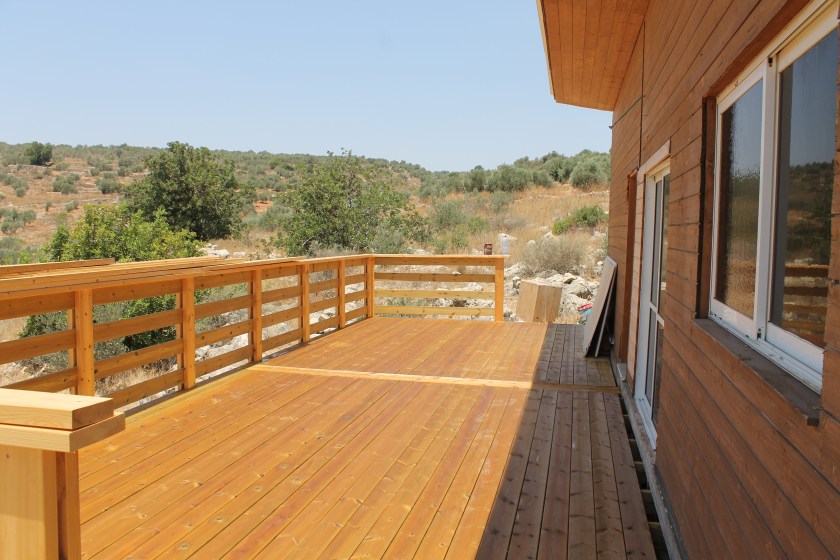
Above: deck at our new cabin

I do have to be fair and acknowledge that all these wonderful outdoor extensions are only possible if you are living on the land. In city apartments, you just make do with your space (though I’ve seen some very neat space-utilization practices done in apartments too). But if you have some land, however little, you can work wonders.

We have been married close to nine years now, and we are on our fourth house, so far. Despite my desire to get settled in a permanent home (as much as anything can be permanent in this world) straight away, I think it was a blessing in its way, because it did force us to go through our possessions from time to time and decide what we can’t do without. When you must pay to have your stuff moved, you’ll probably let go of that old broken-down washer than has been sitting in your back yard for years, waiting to be turned into a potter’s wheel or some other marvelous engine (talking from experience here). Still, we tend to accumulate possessions at an alarming rate.

At this time, we are facing the prospect of moving to a smaller house. When it first began to dawn upon me this is a serious possibility, it was daunting. How would I sort through all our things? Obviously we wouldn’t be able to keep everything. We’d have to get rid of stuff, possibly a lot of stuff. How would we fit into a smaller space? But now that I’ve found Teri’s blog, and the testimonies of other people who have downsized and are happier for it, I’m not nervous anymore, but rather looking forward to this as a challenge. In the future I hope to post updates of our progress.

Melons

ripemelon

Above is one of the melons we grew this season. We only grew a couple of vines for the experiment, from seeds we saved a couple of years ago from an especially delicious specimen (which we bought at the store, by the way). We planted rather late and the melons sure took their time to ripen, but the wait was definitely worth it. The fruit was small, but very fragrant and sweet, since we allowed it to fully ripen on the vine before picking. I think I’m going to save seeds from this one too, to plant next year.

And, yes, in the background you can see some more hot peppers! The bounty sure doesn’t stop, and I’m going to make some more hot sauce soon.

You can read more about growing food from supermarket scraps here and here.

Easy coconut body butter

I got my hands on a nearly-discarded bar of coconut oil in my Mom’s refrigerator. At first I thought it’s some ancient soap, but when I asked and was casually told that “it should probably be thrown out, it has been here for years”, I took it for myself.

The internet is full of wonderful recipes for homemade creams, lotions, butters, balms and scrubs using coconut oil, and the simplest of them is this: just take some coconut oil (in solid consistency – cool it if you need to) and whip it with an electric beater until you get a smooth, airy texture, akin to whipped cream. I tried to do that, but the coconut oil itself was too thick to whip up well. I had to add a glug of almond oil – don’t ask me for quantities, but I think it was about 1 tbsp. of almond oil to 1/2 cup of coconut oil.

By the way, I used almond oil because that’s what I had on hand, but I daresay it’s also possible to use olive, wheat germ or grape seed oil, or whatever you prefer.

When what I had in the bowl resembled whipped cream so much that my daughters begged to lick the beaters, I stopped whipping and scooped what I got into a small wide-mouthed jar, which I refrigerated for an hour or so before transferring it to room temperature. Then I tried the body butter. It has a lovely creamy consistency and feels very pleasant on dry hands. And it cost practically nothing!

coconut

In various recipes, I saw that people suggest adding a few drops of essential oils to your skin product. While I imagine a hint of lemon, orange or lemongrass wouldn’t go amiss if I had them on hand, I must say I simply love the pure natural smell of coconut, which is both gentle and delicious.

Result: easy-to-make, very affordable, 100% natural concoction that I wouldn’t hesitate to use even on small children or babies.

Growing food from supermarket scraps: update

Following my previous post on saving seeds from supermarket vegetables, I’ve decided to post an update. This week we have actually harvested the first tomatoes we’ve planted from seeds which came from a supermarket tomato. They sprouted and grew fast into little bushes which produced plenty of cherry tomatoes – which, though they didn’t exactly resemble the mother plant, were highly edible.

supermarketcherries

Our melons, too, are ripening fast, though we haven’t actually tasted one yet. These were grown from seeds we had saved from an especially delicious store-bought melon, and kept for about two years.

growingmelon

Bottom line: it is possible to save seeds from supermarket vegetables, though a reputable seed company will give you better reliability and variety, and higher germination rates.

Supermarket seeds: grow fresh food from store-bought produce

Not long ago, my husband brought home a packet of coriander (cilantro) seeds from the store. They are great in soups, stews and many other dishes. Then, by a stroke of inspiration, he said, “hey, why don’t we try to make them grow?”

I wasn’t sure the seeds were viable, but we had nothing to lose, right? I tried to plant a few and, while only about 30% germinated, it was alright by me as we had so many and bought them so cheaply. A tiny packet of planting seeds would have cost us a lot more (yes, even taking into account the low germination rate).

Below, you can see one of the new coriander plants grown from these seeds. The other plants in the photos – cherry tomatoes, peppers, melons and beans – were likewise grown from supermarket produce.

All these wonderful plants were grown from scraps most people toss into the garbage without a second thought. 

There’s no doubt it’s always better to purchase high-quality seeds from a reputable company. This way you know exactly what you’re getting and the germination rate, with proper handling, is high. Supermarket vegetables are often hybrids, so saving and planting seeds from them can have unpredictable results. But I still think supermarket-produce seeds deserve a chance. They are very cheap, readily available, and most likely you already have some on hand. There’s certainly no loss (except for a little work and some garden space) in trying, and it can be a fun experiment.

I haven’t actually collected a harvest from these supermarket-originated plants yet, but when I do, I plan to write a follow-up post and tell you whether the produce was any good and how much it resembled the mother plant.

Collecting dew: another step in water conservation

There’s a lot of talk about collecting rainwater as a frugal and ecology-conscious way to reduce water waste, and that’s certainly a good thing and a project we hope to take up in the future. I do have to say, though, that in Israel we don’t get any rain to speak of approximately from May to October. What we can do in the summer months, without any special equipment, is collect dew.

Our system is simple. We have a plastic awning at the entrance to our home, and when I step out early in the morning I can see puddles of water around it. By placing buckets in strategic locations, and then combining their contents, we get roughly a bucket of clean water every day this way. We primarily use it in the garden, but if we used cleaner containers I wouldn’t hesitate to drink it. It’s easy, useful, doesn’t cost anything and could turn out very important in a survival situation. I expect we could harvest a lot more water if we set up a water catchment system all around our roof, too.

The dew we collect is used daily to water our garden. Our peppers already look very promising!

I have noticed that dew is especially abundant when a cool, quiet night follows a hot day. We have many such nights during the summer, as we live up in the hills and usually experience very pleasant temperatures once the sun sets. In Israel, and in other countries with an arid climate, dew collection can be done on a larger scale and play an important role in water conservation.