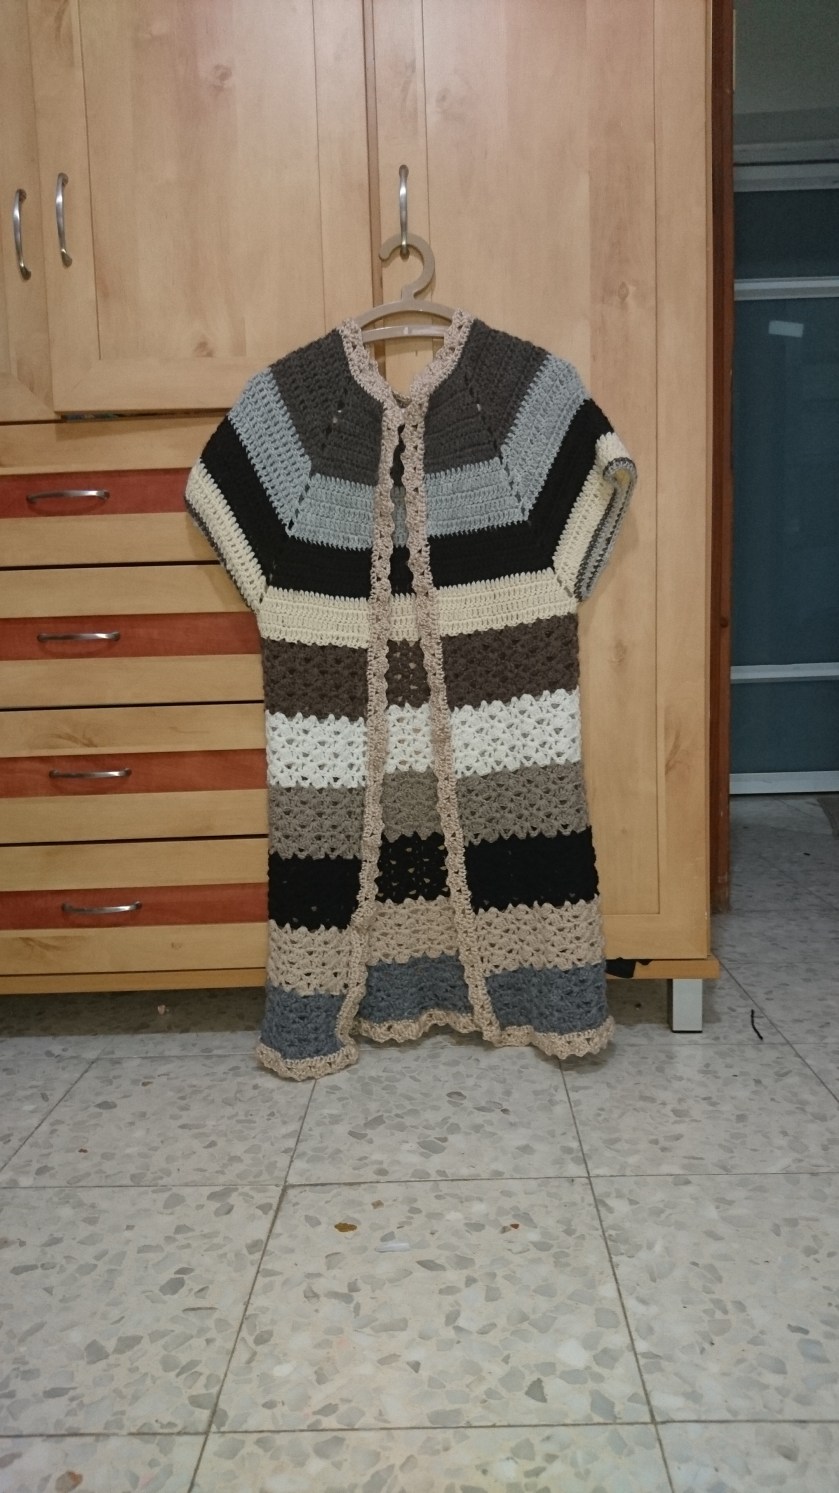
A baby for my baby

DSC_0532

During this busy time of us all staying at home in quarantine, I found a few relaxing moments to put the finishing touches on this crochet doll I got done just in time for Hadassah’s second birthday. I’m happy to say that, though not perfect, this cuddly doll is a big hit and Hadassah loves toting it around.

I made it like I usually make my dolls – crochet the head and body from the top down, fill with stuffing, and then attach arms and legs. Then I used scraps from other projects for the dress. That’s one of the things I love most about making dolls – you get to use up yarn odds and ends, and the craft cupboard is a lot less messy by the time you’re done.

IMG_20200322_210745_833

Here is also a photo from our walk this afternoon. We are being very, very careful, but fortunately, very close to our house there are empty fields where you can wander as much as you want without meeting a living soul except the occasional distant glimpse of someone walking their dog.

DSC_0527

I hope everyone is staying safe and healthy. Please run no risks! We’ve got this and we’ll get through this.

Advertisement

Finally, warmer weather

DSC_0468

We’re finally enjoying some fine, warmer and drier weather, and I’m taking advantage of it to clear the yard, plant some seeds, and hang out with our chickens (the wooden bed frame you see in the picture is supposed to be used as part of a fence eventually).

DSC_0457

We’re also being spoiled by lots of beautiful, delicious colorful eggs (collected a great many more since this picture was taken).

IMG_20200221_132946_809

I made another dragonfly crochet pullover. These are so easy and fun to make that I might try another one in toddler size too.

IMG_20200219_165304_618

A beautiful rose. I love the hues. Wish I could plant a bush like that around here.

In between, I’m also getting addicted to this YouTube channel. The unique and beautiful tiny houses are so inspiring. Not sure I’d agree to live full-time in some of those, but as retreats they would be charming. Pop over to have a look if you have some spare time.

Chunky crochet hat with stretchy brim

DSC_0351

We’ve finally had some rain, which means long, cozy evenings with lots of yarn! I just finished making this lovely textured hat with a long stretchy brim that can be folded on itself.

It’s really quite similar to my Cozy Cabled Crochet Beanie, except that I made the cabling wider by adding two front post double crochets and alternating the location of the crisscross in each sequence.

I also opted to make the brim with single crochet, rather than slip stitch, in the back loops. It makes for a lighter, less dense texture, uses less yarn, and is less weighty.

Made with yak wool blend and crochet hook number 5.

T-shirt yarn bicolor basket

DSC_0318

This was my first time crocheting a basket with t-shirt yarn, something I have wanted to do for a long time. Here are some insights I came out with:

Pros: I love working with t-shirt yarn! It’s fairly stretchy and slides through the fingers so nicely, with none of the scratchiness of some super bulky yarns or fibers like jute.

It also works up extremely quickly. This little basket here was whipped up in about two hours total. Which brings me to…

Cons: I got a rather smaller basket than I thought I would get. The diameter of the bottom is about the size of a dinner plate. I love little baskets and have a myriad uses for them, but I was kind of hoping for a larger one this time. When I finished, I realized that if I want a larger basket, I would have to spend more on materials than I was willing to.

Tips: This was my first time using the waistcoat stitch, and I think it’s just perfect for baskets. It works up very similarly to single crochet, except that instead of working into the top of the stitch, you insert the hook right into the middle of the little “v” in the previous row. This creates a sturdier texture that is really great for getting the basket to stand up on its own.

I also feel I’ve discovered my favorite yarn proportion for bottom vs. sides: 1\3 yarn for bottom, 2\3 for sides. That is, if you have 3 skeins, use one for the bottom and two for the sides.

I’d love to try making my own t-shirt yarn, but I’m not convinced it would be a good use of my time. If I give it a go, I’ll be sure to let you know!

Slouchy beret in double crochet

DSC_0285

So the crochet spree is still going on? You bet it is, with switching to winter time and the resulting long dark evenings. And what can be more fun and rewarding than making something you can whip up quickly to wear the next day?

I had long wanted one of those cute slouchy berets, and I had some deliciously soft velvet yarn sitting in my stash, calling out, “pick me up and do something with me” – so I did. By the way, it turned out a lot more economical than I thought it would. I only used one 100 gr skein of the navy blue yarn and a bit of grey for the flower. Which leaves me with plenty more yarn to make matching berets for my daughters! Hurray!

There are lots of fancy hat patterns out there, with cables and ridges and bobbles and swirls, but I soon realized it’s better to go for the simplest way when working with this yarn, which is as snuggly, warm and floppy as a newborn kitten.

The basic free-form instructions to make a beret go like this: start crocheting a circle and, increasing the number of stitches in each round, create something like a flat pancake the size of a dinner plate (give or take).

Crochet one round without increasing. Then begin decreasing at the same rate you were doing the increase on your last row. That is, if you were adding a stitch every ten stitches, start decreasing every ten stitches by skipping a stitch. Try on your beret from time to time. Once it fits on your head to your liking, make a few rounds without increasing or decreasing for the brim. I made the main body of my beret in double crochet and the brim in single crochet for a snugger, denser feeling fit.

You can add a flower like I did – there are lots of fancy ideas out there, but I just did something basic: make a slip knot and work double crochet stitches into it to make a snug circle. Then make the petals by working alternately 3 DC in one stitch, 1 SC in next, and so on.

Secure your flower by weaving the loose ends into the brim of the beret.


Snuggly puff crochet poncho

IMG_20191023_171600_092

Autumn, with cooler, shorter, rainy days has come even to our warm corner of the world, and what can be better to celebrate this change of seasons than a new warm cozy poncho (crocheted out of upcycled merino wool with an alpaca trim)? It feels like wearing a snuggly blanket and making it was pure delight.

I kind of winged it and don’t have an exact pattern precisely because it’s such a basic, easy garment. Essentially, if you know how to make a granny square, you can make a basic poncho. 

Start by creating a chain and joining the two ends together, making a circle. This will be the head opening so don’t make it too tight. Make a row of double crochet around the chain, adjusting your number of stitches so that it’s a multiple of 4.

Divide the number of stitches by 4 and, at the end of each quarter, create a corner as you would when making a granny square and crocheting from the center. Once you have your corners established, that’s it! You just keep adding, and the possibilities are endless. I used a freestyle combo of V-stitches and puff V-stitches for a bumpy textured look.

Once you have made your poncho as long as you like, return to the beginning and start working upwards from your foundation chain to make the cowl neck. I used this vintage pattern for mine:

dsc_0280-e1571860048946.jpg

In the end, if you have some leftover yarn, you can choose to make a fringe like I did. There are several methods for making a fringe, and I chose the simplest one I could find. I love fringes for the cute boho look they give and for their ability to make a garment visually longer with very little effort and comparatively little yarn.

With some creativity and daring, you can make your own original cozy poncho. Happy crafting!

Light cotton crochet cardi

img_20191013_105554_422.jpg

In a final crafting spree before the Feast of Tabernacles, I finished this light cotton cardigan in the picot fan stitch. I worked from the top down, following this tutorial, and then added a harmonizing border around the edge and sleeves.

I used a beautiful, soft, drapey bamboo and cotton blend and crochet hook number 2.

I look forward to wearing this during the balmy Sukkot evenings.

%d bloggers like this: